Easy Halloween Treat Recipes Spooky Fun
40 Easy Halloween Treat Recipes (Spooky & Fun) start with the basics. Having all-purpose flour, granulated sugar, baking soda, and salt on hand means you’re ready for a lot of simple cookie and cake recipes. Unsalted butter and eggs are also key for richness and structure in most baked goods. Vanilla extract adds that essential warm flavor. For decorating, powdered sugar and milk make a quick icing, while food coloring in orange, black, green, and red lets you get creative with Halloween themes. Chocolate chips are always a hit, and candy eyes bring instant character to treats. Pretzels can be used for spooky shapes or salty crunch. Cream cheese and butter add tang and creaminess to dips and frostings. Store-bought or homemade cookies and cake mixes simplify things further, letting you focus on the fun decorations. Baked and cooled cupcakes are a blank canvas for ghostly creations. Candy corn and gummy worms are classic Halloween candies that can be incorporated directly into treats. Popcorn is great for making crunchy clusters. Graham crackers can become bases for little treats. Peanut butter cups and Oreo cookies are favorites that can be transformed with a few additions. White chocolate chips and black licorice are perfect for spooky details. Small marshmallows can be melted or used as is. Peanut butter and jam are classic sandwich cookie fillings or can be used in no-bake bars. Puff pastry bakes up flaky and can be shaped into spooky swirls. Sausages or hot dogs wrapped in breadsticks make easy ‘mummy’ dogs. Green sprinkles and red candy melts add color and flair. Edible googly eyes are another simple way to add personality. Caramel sauce and Cool Whip can create layered desserts or creamy dips. Cocoa powder is essential for chocolate lovers. Shredded coconut can mimic ghosts or spooky cobwebs. Black sanding sugar adds a sparkly, dark finish. Having ghost and pumpkin-shaped cookie cutters makes creating themed cookies a breeze.
40 Easy Halloween Treat Recipes (Spooky & Fun)
Halloween is that time of year when we embrace the spooky, the fun, and of course, the delicious. This collection of 40 easy Halloween treat recipes is designed to bring a smile to your face and a dash of fright to your party table. From simple candy swaps to impressive-looking desserts that are surprisingly easy to make, there’s something here for every skill level and taste bud. We’ll cover everything from ghostly cookies and monstrous cupcakes to creepy dips and surprisingly spooky savory snacks. Get ready to impress your friends and family with these frightfully good creations.
Ingredients:
- All-purpose flour
- Granulated sugar
- Baking soda
- Salt
- Unsalted butter
- Eggs
- Vanilla extract
- Powdered sugar
- Milk
- Food coloring (orange, black, green, red)
- Chocolate chips
- Candy eyes
- Pretzels
- Cream cheese
- Buttercream frosting
- Cookies (store-bought or homemade)
- Cake mix (any flavor)
- Cupcakes (baked and cooled)
- Candy corn
- Gummy worms
- Popcorn
- Graham crackers
- Reese’s peanut butter cups
- Oreo cookies
- White chocolate chips
- Black licorice
- Small marshmallows
- Peanut butter
- Jam or jelly
- Puff pastry
- Sausages or hot dogs
- Breadsticks
- Green sprinkles
- Red candy melts
- Edible googly eyes
- Caramel sauce
- Cool Whip
- Cocoa powder
- Shredded coconut
- Black sanding sugar
- Ghost-shaped cookie cutters
- Pumpkin-shaped cookie cutters
Getting Started: The Foundation of Many Treats
Many of these recipes rely on a few simple baking staples. Having all-purpose flour, granulated sugar, baking soda, salt, unsalted butter, eggs, and vanilla extract on hand is a great starting point for a baking marathon. For decorations, powdered sugar and milk are essential for creating quick icing. Food coloring is your best friend for transforming plain batters and frostings into Halloween-themed masterpieces. Don’t forget the fun decorative elements like candy eyes, chocolate chips, and sprinkles.
Step-by-Step Spooky Creations
Here’s a look at how we’ll bring some of these treats to life.
- Ghostly Meringue Cookies: For these ethereal treats, start by whipping 2 large egg whites until foamy. Gradually add 1/2 cup of granulated sugar, beating until stiff, glossy peaks form. Fold in 1 teaspoon of vanilla extract. Spoon or pipe mounds of meringue onto a baking sheet lined with parchment paper. Use a toothpick dipped in black food coloring to draw two small dots for eyes on each meringue ghost. Bake at 200°F (95°C) for about 1.5 to 2 hours, or until the meringues are dry and crisp. Let them cool completely on the baking sheet. The low temperature ensures they dry out without browning, giving them that perfect ghostly texture.
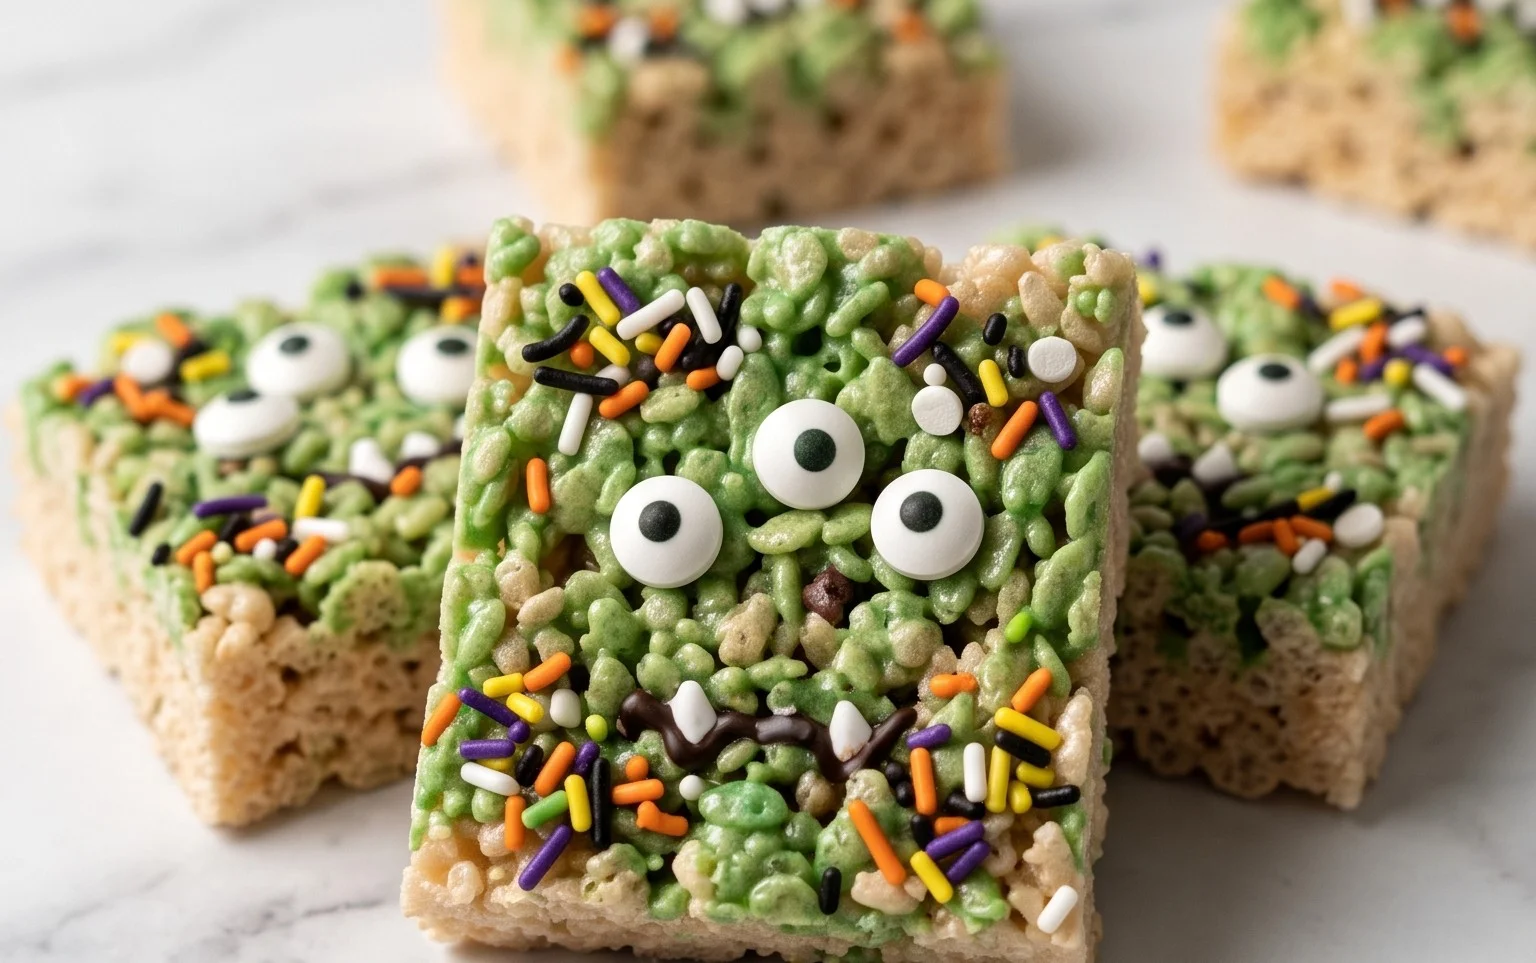
- Monster Cookie Bars: This recipe is a crowd-pleaser and very forgiving. In a large bowl, cream together 1 cup (2 sticks) of softened unsalted butter with 1.5 cups of granulated sugar and 1 cup of packed light brown sugar. Beat in 2 large eggs, one at a time, followed by 2 teaspoons of vanilla extract. In a separate bowl, whisk together 3 cups of all-purpose flour, 1 teaspoon of baking soda, and 1 teaspoon of salt. Gradually add the dry ingredients to the wet ingredients, mixing until just combined. Stir in 2 cups of chocolate chips and 1 cup of M&M’s (or other festive candies). Press the dough evenly into a greased 9×13 inch baking pan. Bake at 350°F (175°C) for 25-30 minutes, or until golden brown around the edges and set in the center. Let cool completely before cutting into bars. For a monster effect, you can add a few dollops of green or purple frosting and edible googly eyes once cooled.
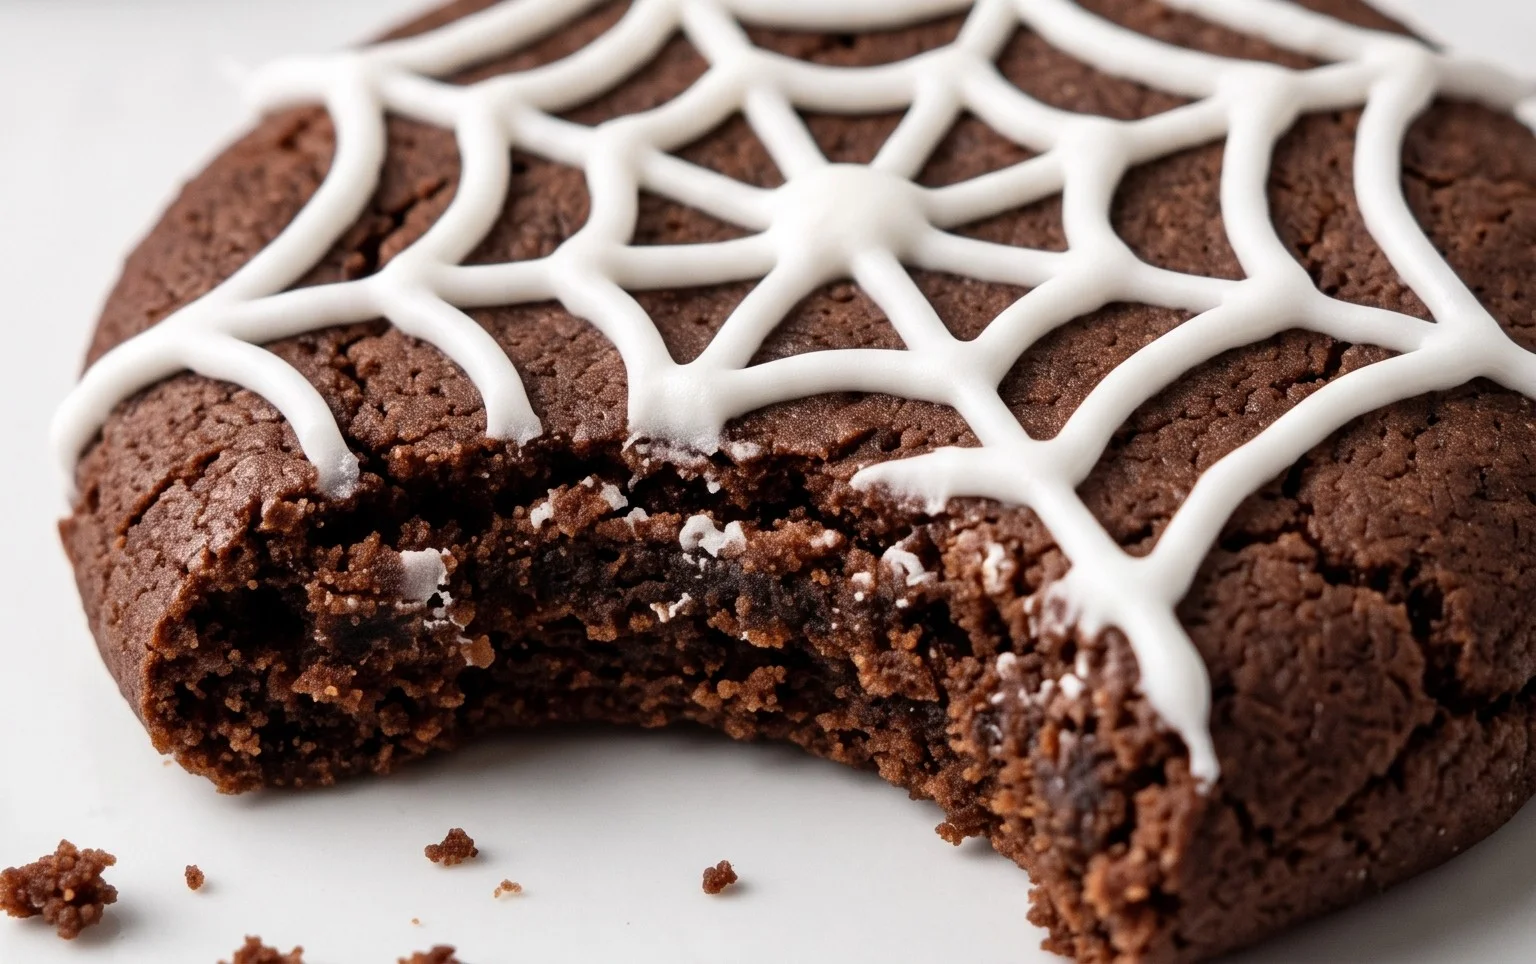
- Spiderweb Brownies: Start with your favorite brownie recipe or a boxed mix. Prepare the brownies according to package directions and bake in a 9×13 inch pan. While the brownies are still warm, but not hot, prepare a simple white icing by mixing 1 cup of powdered sugar with 1-2 tablespoons of milk until smooth and spreadable. Spread this white icing evenly over the top of the brownies. Immediately, using black icing (powdered sugar mixed with a little water and black food coloring) or melted black candy melts in a piping bag or a zip-top bag with a corner snipped off, draw concentric circles on top of the white icing, starting from the center. Then, using a toothpick or a skewer, drag lines from the center outwards through the black lines to create a spiderweb effect. This technique is simple yet incredibly effective for a spooky design.
- Mummy Pretzel Rods: This is one of the easiest and most fun treats for kids to help with. Melt white chocolate chips (about 1.5 cups) in a microwave-safe bowl in 30-second intervals, stirring in between, until smooth. Alternatively, use a double boiler. Dip each pretzel rod about two-thirds of the way into the melted white chocolate, letting any excess drip off. Place the dipped pretzels on parchment paper. Before the chocolate sets, use a fork or a piping bag filled with a small amount of melted chocolate (or black icing) to draw two lines for the mummy’s eyes near the top of the white chocolate. You can also drizzle some chocolate to create a more “bandaged” look. Let them set completely at room temperature or in the refrigerator.
- Graveyard Pudding Cups: Layer chocolate pudding (store-bought or homemade) into clear plastic cups or jars. Once the pudding is set, top with crushed Oreo cookies to resemble dirt. For the gravestones, use Milano cookies or other rectangular cookies. Write “RIP” or other spooky messages on the cookies with black edible marker or a small amount of black icing. Stick a tombstone into the “dirt” of each pudding cup. You can also add gummy worms peeking out of the dirt for an extra creepy touch. This is a no-bake dessert that is always a hit.
Variations and Tips for Extra Spookiness
- Candy Eyeball Frenzy: Edible candy eyes are a superhero for Halloween. They can transform plain cupcakes, cookies, or even fruit slices into monsters.
- Color Play: Don’t be afraid to experiment with food coloring. Orange, black, green, and purple are classic Halloween colors. Swirl colors together for a marbled effect.
- Shape Shifters: Use cookie cutters in Halloween shapes like bats, ghosts, pumpkins, and skulls to cut out cookies, sandwiches, or even fruit slices.
- Gooey Goodness: Melted caramel and chocolate are your friends. They can be used for dipping, drizzling, or creating spooky cobwebs and drips.
- Savory Surprises: Not all Halloween treats need to be sweet. Consider “finger” breadsticks (breadsticks with an almond sliver glued on with cream cheese for a fingernail), or mini hot dogs wrapped in pastry to look like mummy fingers.
These recipes are designed to be accessible and fun, encouraging creativity and bringing a touch of Halloween magic to your kitchen. Enjoy making these treats, and more importantly, enjoy sharing them with loved ones!
Conclusion:
This collection of 40 Easy Halloween Treat Recipes (Spooky & Fun) is your go-to guide for a memorable Halloween. We’ve covered everything from simple, no-bake ideas to slightly more involved, but still manageable, baking projects. The beauty of these recipes is their adaptability. You can swap ingredients based on what you have or what your family loves. For example, if you don’t have candy eyes, mini chocolate chips can easily stand in for pupils. Don’t like green frosting? Try purple or a deep blue for a different creepy effect. These treats are perfect for classroom parties, neighborhood trick-or-treat handouts, or just a fun weekend activity with the kids. Serve ghost cookies alongside a bubbling cauldron of green punch, or arrange mummy dogs on a platter for a spooky appetizer spread. They also make great edible gifts for friends. The real reward is seeing the smiles these fun, spooky creations bring. Give them a try and embrace the spirit of Halloween!
Frequently Asked Questions:
Can I make these Halloween treats ahead of time?
Many of these recipes can be made a day or two in advance. Cookies usually store well in airtight containers at room temperature. Cupcakes, once decorated, are best stored in an airtight container at room temperature for 1-2 days, though very cold weather might mean refrigeration is needed for frosting stability. Dips should be refrigerated and are best made closer to serving time. Check individual recipe notes for specific storage recommendations.
What if I don’t have specific Halloween cookie cutters?
No problem! You can still achieve a Halloween theme. For ghost shapes, simply cut out circles or ovals and then use icing to draw ghost faces. For pumpkin shapes, cut out circles and use orange icing and black details. You can also use regular cutters and then decorate the resulting shapes with Halloween colors and spooky designs like spiderwebs or monster eyes.
Are these recipes suitable for very young children?
Absolutely. Many of the no-bake options and simple decorating activities are perfect for little hands. Recipes involving simple assembly or just decorating pre-made cookies are especially good for toddlers and preschoolers. Always supervise young children when using kitchen tools or near the oven.
40 Easy Halloween Treat Recipes (Spooky & Fun)
A collection of 40 easy, spooky, and fun Halloween treat recipes perfect for parties or trick-or-treaters.
Ingredients
-
All-purpose flour
-
Granulated sugar
-
Butter
-
Eggs
-
Milk
-
Vanilla extract
-
Cocoa powder
-
Baking soda
-
Salt
-
Powdered sugar
-
Cream cheese
-
Food coloring (orange, black, green)
Instructions
-
Step 1
Gather all necessary ingredients for your chosen Halloween treat. -
Step 2
Prepare the base dough or batter according to individual recipe instructions. This may involve creaming butter and sugar, mixing dry ingredients, and combining wet ingredients. -
Step 3
Divide and color doughs or batters as needed for spooky designs (e.g., orange for pumpkins, black for ghosts). -
Step 4
Shape and assemble the treats. This could involve cutting cookies into Halloween shapes, piping frosting, or assembling layered desserts. -
Step 5
Bake or chill the treats as directed by the specific recipe. -
Step 6
Decorate the cooled or set treats with icing, sprinkles, candy eyes, or other edible decorations to enhance the Halloween theme.
Important Information
Nutrition Facts (Per Serving)
It is important to consider this information as approximate and not to use it as definitive health advice.
Allergy Information
Please check ingredients for potential allergens and consult a health professional if in doubt.


